YOLOv3#
- class c4dynamics.detectors.yolo3_opencv.yolov3(weights_path: str | None = None)[source]#
YOLO: Real-Time Object Detection
yolov3is a YOLOv3 (You Only Look Once) object detection model. Though it is no longer the most accurate object detection algorithm, YOLOv3 is still a very good choice when you need real-time detection while maintaining excellent accuracy.YOLOv3 processes an entire image in a single forward pass, making it efficient for dynamic scenes. Its key strength lies the ability to simultaneously predict bounding box coordinates and class probabilities for multiple objects within an image.
- Parameters:
weights_path (str, optional) – Path to the YOLOv3 weights file. Defaults None.
See also
Classes
Using YOLOv3 means object detection capability with the 80 pre-trained classes that come with the COCO dataset.
The following 80 classes are available using COCO’s pre-trained weights:
COCO dataset
person, bicycle, car, motorcycle, airplane, bus, train, truck, boat, traffic light, fire hydrant, stop sign, parking meter, bench, bird, cat, dog, horse, sheep, cow, elephant, bear, zebra, giraffe, backpack, umbrella, handbag, tie, suitcase, frisbee, skis,snowboard, sports ball, kite, baseball bat, baseball glove, skateboard, surfboard, tennis racket, bottle, wine glass, cup, fork, knife, spoon, bowl, banana, apple, sandwich, orange, broccoli, carrot, hot dog, pizza, donut, cake, chair, couch, potted plant, bed, dining table, toilet, tv, laptop, mouse, remote, keyboard, cell phone, microwave, oven, toaster, sink, refrigerator, book, clock, vase, scissors, teddy bear, hair drier, toothbrush
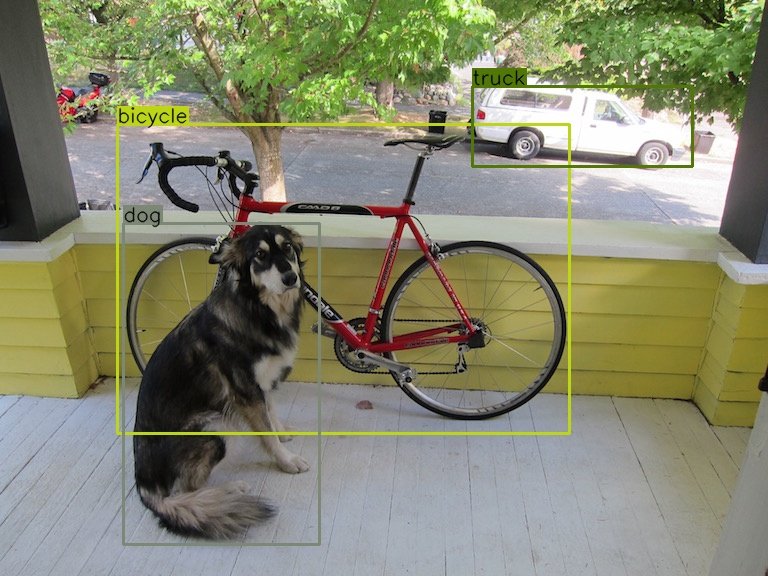
Figure 1: Object Detection with YOLO using COCO pre-trained classes ‘dog’, ‘bicycle’, ‘truck’. Read more at: darknet-yolo.
Implementation (c4dynamics)
The
yolov3class abstracts the complexities of model initialization, input preprocessing, and output parsing. Thedetectmethod returns apixelpointfor each detected object. The pixelpoint is apredefined state classrepresenting a data point in a video frame with an associated bounding box. Its methods and properties enhance the YOLOv3 output structure, providing a convenient data structure for handling tracking missions.Installation
C4dynamics downloads the YOLOv3’ weights file once at first call to
yolov3and saves it to the cache. For further details seedatasets. Alternatively, the user can provide a path to his own weights file using the parameter weights_path.Construction
A YOLOv3 detector instance is created by making a direct call to the yolov3 constructor:
>>> from c4dynamics.detectors import yolov3
>>> yolo3 = yolov3()
Fetched successfully
Initialization of the instance does not require any mandatory parameters.
Example
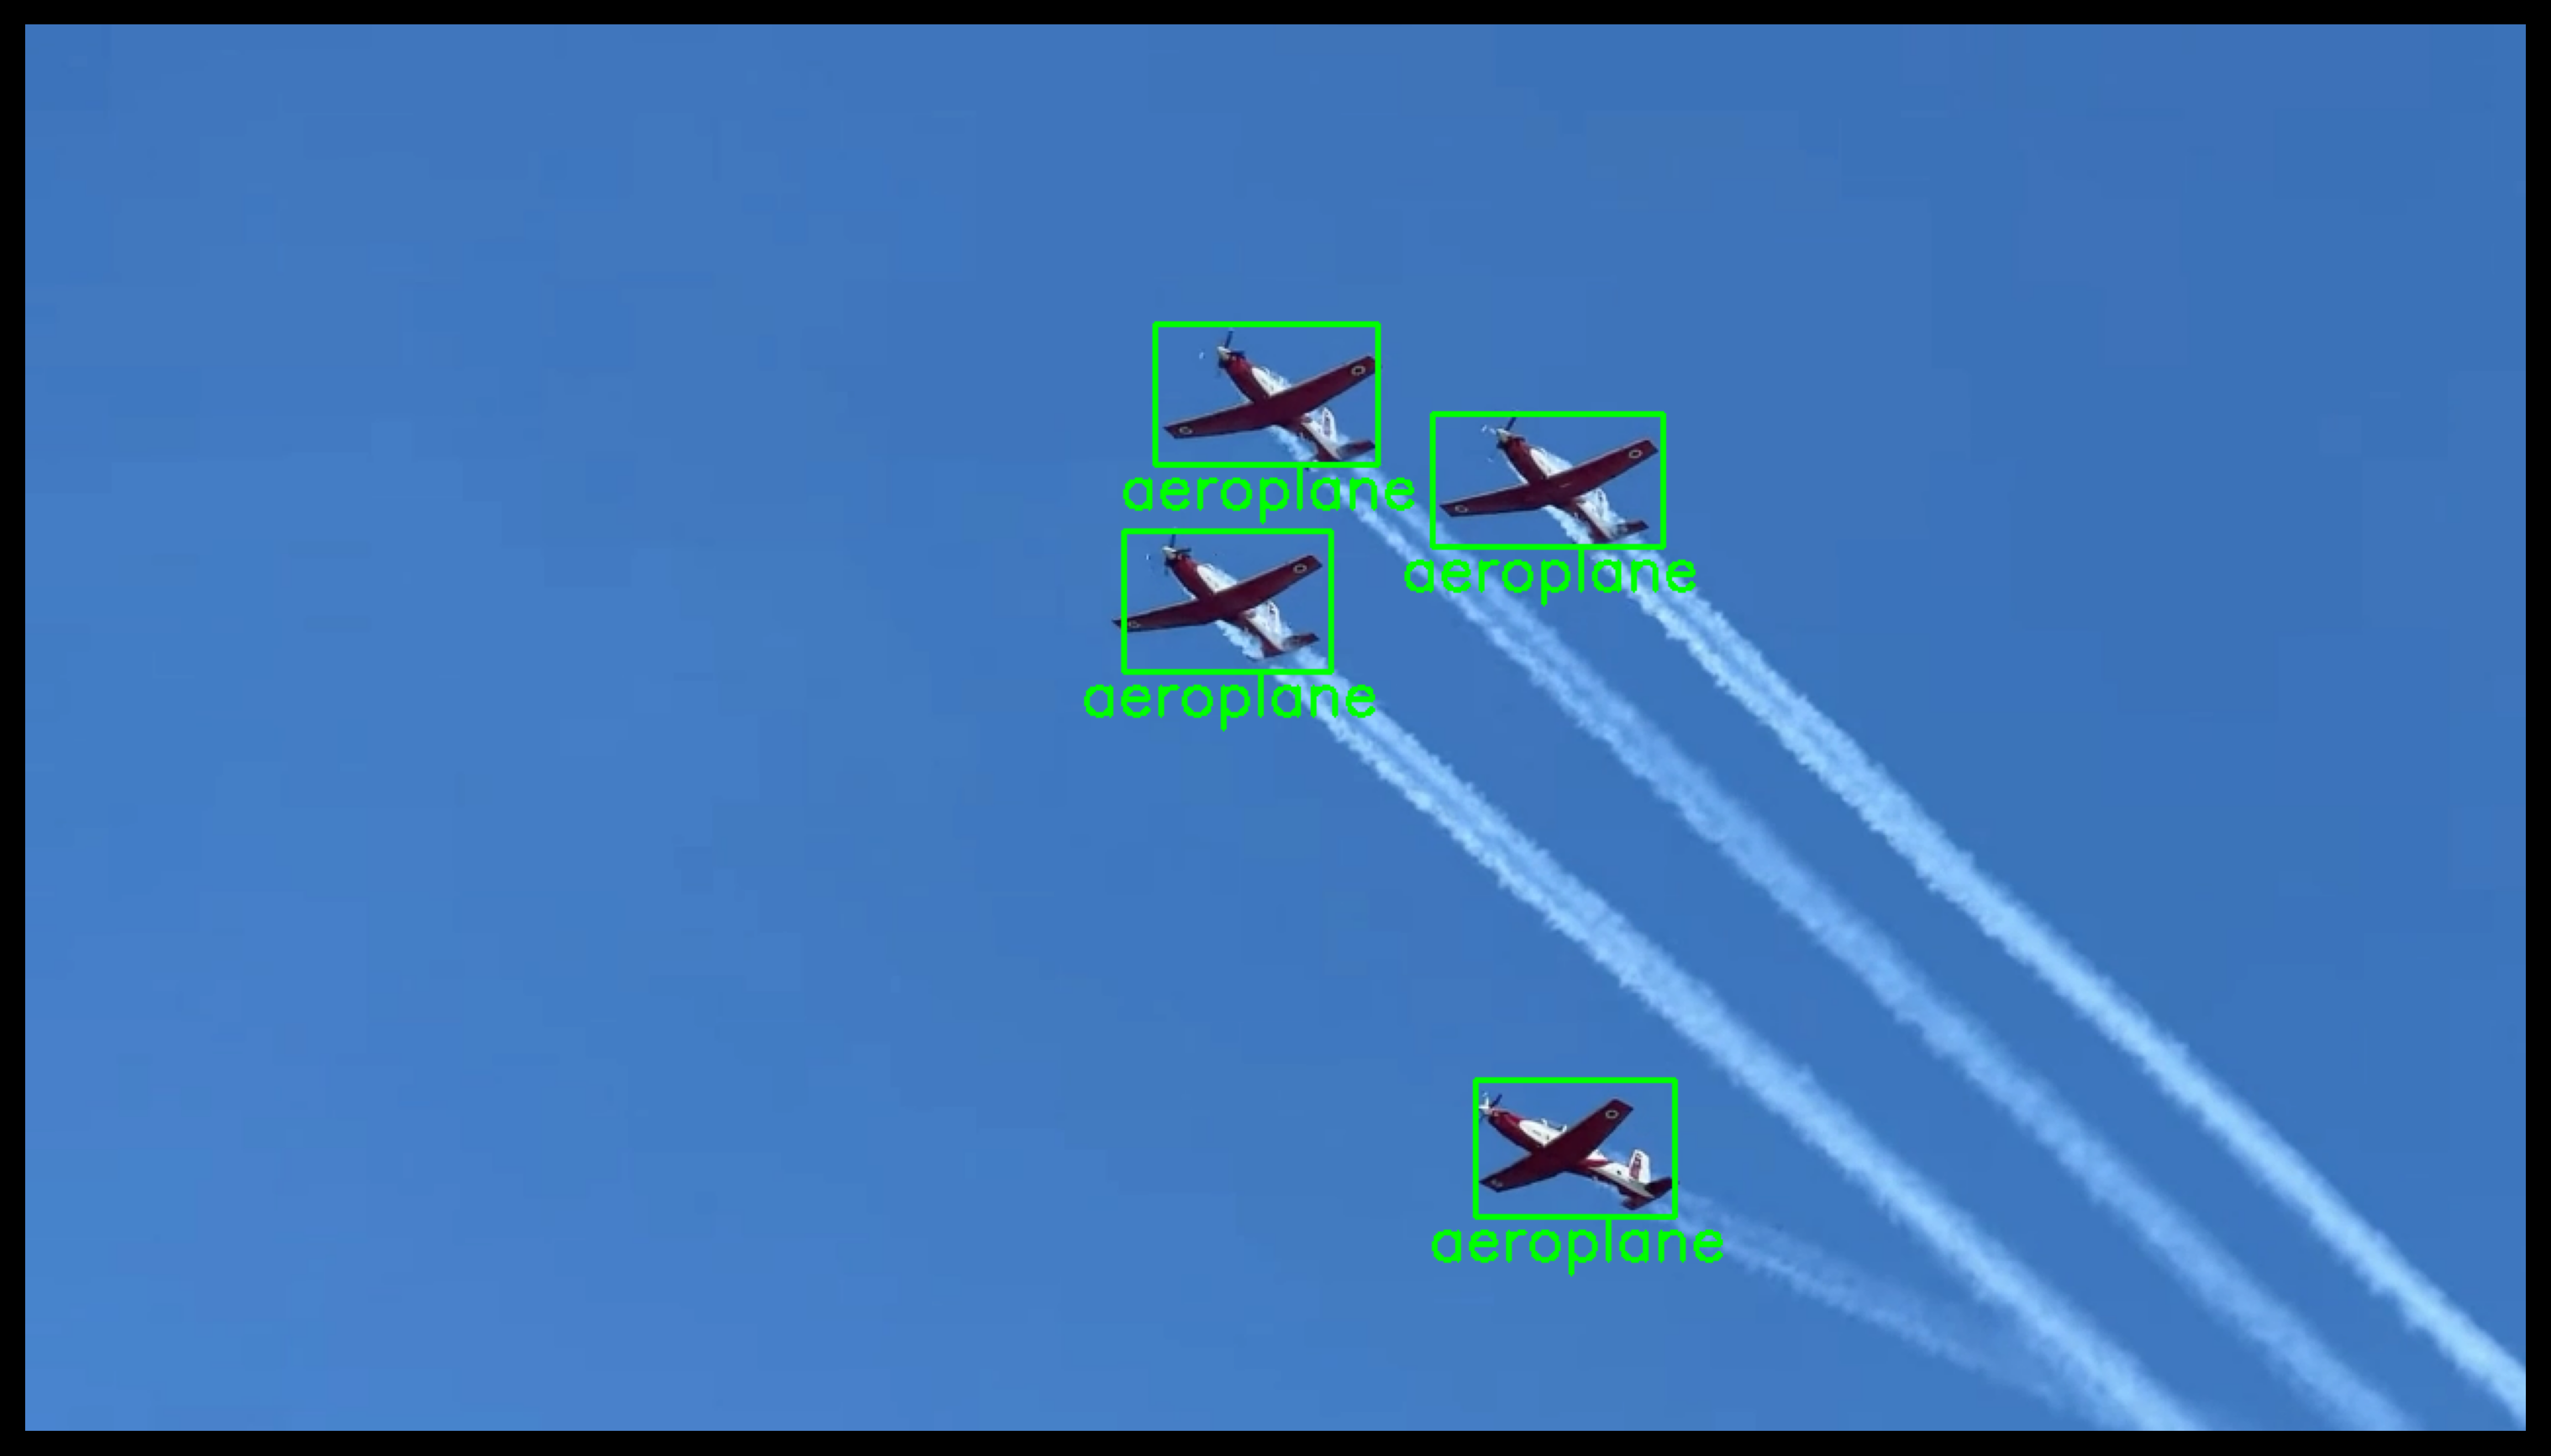
The following snippet initializes the YOLOv3 model and runs the detect() method on an image containing four airplanes. The example uses the datasets module from c4dynamics to fetch an image. For further details, see
c4dynamics.datasets.Import required packages:
>>> import cv2
>>> import c4dynamics as c4d
>>> from matplotlib import pyplot as plt
Load YOLOv3 detector:
>>> yolo3 = c4d.detectors.yolov3()
Fetched successfully
Fetch and read the image:
>>> imagepath = c4d.datasets.image('planes')
Fetched successfully
>>> img = cv2.imread(imagepath)
Run YOLOv3 detector on an image:
>>> pts = yolo3.detect(img)
Now pts consists of
pixelpointinstances for each object detected in the frame. Let’s use the properties and methods of the pixelpoint class to view the attributes of the detected objects:>>> def ptup(n): return '(' + str(n[0]) + ', ' + str(n[1]) + ')' >>> print('{:^10} | {:^10} | {:^16} | {:^16} | {:^10} | {:^14}'.format('center x', 'center y', 'box top-left', 'box bottom-right', 'class', 'frame size')) >>> for p in pts: ... print('{:^10d} | {:^10d} | {:^16} | {:^16} | {:^10} | {:^14}'.format(p.x, p.y, ptup(p.box[0]), ptup(p.box[1]), p.class_id, ptup(p.fsize))) ... cv2.rectangle(img, p.box[0], p.box[1], [0, 0, 0], 2) # +IGNORE_OUTPUT ... point = (int((p.box[0][0] + p.box[1][0]) / 2 - 75), p.box[1][1] + 22) ... cv2.putText(img, p.class_id, point, cv2.FONT_HERSHEY_SIMPLEX, 1, [0, 0, 0], 2) center x | center y | box top-left | box bottom-right | class | frame size 615 | 295 | (562, 259) | (668, 331) | aeroplane | (1280, 720) 779 | 233 | (720, 199) | (838, 267) | aeroplane | (1280, 720) 635 | 189 | (578, 153) | (692, 225) | aeroplane | (1280, 720) 793 | 575 | (742, 540) | (844, 610) | aeroplane | (1280, 720)
>>> plt.figure()
>>> plt.axis(False)
>>> plt.imshow(cv2.cvtColor(img, cv2.COLOR_BGR2RGB))
Properties
Gets and sets the Non-Maximum Suppression (NMS) threshold.
Gets and sets the confidence threshold used in the object detection.
Methods
yolov3.detect(frame)Detects objects in a frame using the YOLOv3 model.